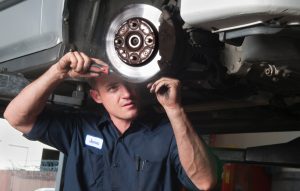
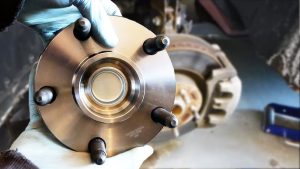
Replacing a wheel hub and bearing assembly is a job that requires precision and attention to detail. While many car owners and even mechanics can perform this task, several common installation mistakes can compromise safety, shorten component life, or lead to repeat failures. In this guide, we’ll explore typical errors made during hub and bearing replacement — and how to avoid them for a smooth, safe, and long-lasting repair.

When it’s time for new parts, be sure to Buy Hub & Bearings online for quality components that fit right the first time.
Why Proper Installation Matters
Wheel hub assemblies and bearings are critical for steering, suspension, and braking performance. Improper installation can lead to:
-
Premature bearing failure
-
ABS malfunction
-
Vibration or wheel noise
-
Safety risks like wheel detachment
Top Hub and Bearing Installation Mistakes
Mistake 1: Reusing Old Fasteners or Not Torquing Properly
Issue: Fasteners like axle nuts, caliper bolts, and hub bolts often stretch or degrade over time. Improper torque during reinstallation can either overtighten (causing damage) or undertighten (leading to movement and wear).
Avoid it by:
-
Always using new fasteners if specified
-
Following manufacturer torque specifications
-
Using a calibrated torque wrench
Example Torque Values
| Component | Typical Torque Range (Nm) | Notes |
|---|---|---|
| Axle nut | 200–350 Nm | Use new nut if required |
| Hub mounting bolts | 80–150 Nm | Use Loctite if specified |
| Caliper bracket | 90–120 Nm | Ensure even torque distribution |
Mistake 2: Hammering or Forcing the Bearing
Issue: Striking a hub or bearing with a hammer or using excessive force during removal/installation can deform components and destroy the bearing’s internal race.
Avoid it by:
-
Using a bearing press or puller set
-
Heating the knuckle slightly to aid insertion (if applicable)
-
Applying even pressure with proper tools, never a hammer
Mistake 3: Installing the Bearing in the Wrong Orientation
Issue: Some bearings (especially with built-in ABS sensors) have a specific orientation. Installing them backward will cause ABS malfunctions or total sensor failure.
Avoid it by:
-
Verifying orientation via markings (ABS side often labeled)
-
Using OEM diagrams or installation instructions
-
Matching the new part to the old one before insertion
Mistake 4: Not Cleaning the Hub Seat or Knuckle
Issue: Rust, dirt, or debris between the knuckle and new hub bearing can cause misalignment, leading to premature wear, noise, and vibration.
Avoid it by:
-
Wire-brushing the mounting surface
-
Using anti-seize on mating surfaces
-
Ensuring flat and corrosion-free contact
Checklist: Hub Surface Prep
-
Clean knuckle seat with wire brush
-
Check for rust pitting or deformation
-
Apply thin anti-seize layer to prevent future corrosion
Mistake 5: Ignoring ABS Components
Issue: During replacement, ABS sensor wires may be pinched, contaminated with grease, or improperly seated.
Avoid it by:
-
Cleaning sensor holes before reinstalling
-
Checking wire routing and clips
-
Verifying the ABS sensor is fully seated
Tip: If ABS light turns on after installation, scan for codes — it’s often a sensor alignment or dirt issue.
Mistake 6: Not Checking for Related Wear
Issue: Hub and bearing failures are often related to adjacent worn parts like CV joints, ball joints, or worn tires.
Avoid it by:
-
Inspecting suspension and steering linkage before installing new bearings
-
Checking wheel alignment
-
Ensuring tires are balanced and not cupped
Mistake 7: Failing to Perform Post-Install Alignment
Issue: Replacing hubs or bearings may slightly shift wheel alignment geometry, leading to uneven tire wear or pulling.
Avoid it by:
-
Getting a 4-wheel alignment after installation
-
Checking camber and toe adjustments
Summary Table: Mistakes & Solutions
| Mistake | Potential Problem | How to Avoid |
|---|---|---|
| Not torquing to spec | Loosening, distortion | Use torque wrench, check specs |
| Hammering components | Damaged races, noise | Use bearing press |
| Wrong bearing orientation | ABS sensor failure | Verify markings and instructions |
| Dirty hub mounting surface | Misalignment, vibration | Clean and prep with anti-seize |
| ABS wire damage | ABS light on, malfunction | Route wires properly, clean sensor |
| Overlooking related components | Repeat failure, vibration | Inspect control arms, joints, tires |
| Skipping alignment | Uneven tire wear, pull | Align after install |
Pro Tips for a Smooth Replacement

-
Use quality parts — Not all bearings are equal. Avoid ultra-budget no-name options.
-
Replace in pairs — If one side has failed, the other is likely close behind.
-
Don’t forget grease — If the bearing isn’t pre-lubed, use high-temp wheel bearing grease.
-
Test drive carefully — Listen for noise, check ABS warning lights, and feel for vibrations.
When It’s Time to Replace: Symptoms to Watch For
| Symptom | Likely Cause |
|---|---|
| Humming or growling noise | Worn or dry wheel bearing |
| ABS light or fault code | Damaged sensor or misaligned sensor |
| Wobbling or vibration | Loose hub bolts or misaligned hub |
| Uneven tire wear | Bearing play or post-install misalignment |
Where to Get Quality Hub and Bearing Parts
Don’t let installation mistakes waste your time or money. Always choose quality, vehicle-specific parts.
You can Buy Hub & Bearings online — fast shipping, reliable brands, and exact-fit replacements make your job easier and longer lasting.
Final Thoughts
Wheel hub and bearing installation isn’t overly complex, but precision matters. The most common failures stem not from bad parts, but from poor prep, skipped steps, or improper techniques. By avoiding the common mistakes listed above, you’ll ensure a safer ride, quieter performance, and longer component life.
Whether you’re DIY-ing it in your garage or helping a customer at your shop, the right steps and tools — plus quality parts — make all the difference.